
The third number, the one people misread
Configurations are written with three numbers: the main layer, the subwoofer, then the height layer.
| Configuration | Main layer | Subwoofer | Height | What the height layer allows |
|---|---|---|---|---|
| 5.1.2 | 5 | 1 | 2 | placing a sound above the listener |
| 5.1.4 | 5 | 1 | 4 | moving it from front to back |
| 7.1.4 | 7 | 1 | 4 | the same, with a more enveloping main layer |
The table puts a finger on the essential point: it is the third number that changes the nature of the system, not the first. A 5.1.4 already moves a sound from front to back above you, where a 7.1.2 never will, despite its two extra surround speakers.
That third number is what changes the nature of the system. Two height speakers let a sound be placed above the listener; four let it move from front to back, which is the difference between an impression of height and a genuine hemisphere of sound. That is why 7.1.4 is the reference for dedicated rooms.
The rest of this page is about that height layer, because that is where most of it is decided and where mistakes are irreversible: a flush-mounted speaker in the wrong place does not move.
The elevation angle, the dimension that decides
Dolby's installation guidelines do not think in centimetres but in angle seen from the listening position. For height speakers, the range is 30° to 55° of elevation, with a compromise around 45°.
The logic is simple: too low, and the speaker merges with the main layer so the height effect fades; too high, and it approaches the vertical, tightening the image above your head instead of spreading it.
Dolby adds a common sense marker: height speakers benefit from sitting at roughly two to three times the height of the speakers at listener level.
From angle to centimetres: the arithmetic
You cannot drill an angle. It has to be converted, and trigonometry is enough: the horizontal distance between the seat and the speaker equals the speaker's height above the ear, divided by the tangent of the desired angle.
Taking a seated ear height of 1.20 m, here is the placement window on the ceiling, measured horizontally from the seat:
| Ceiling height | At 55° (upper limit) | At 45° (compromise) | At 30° (lower limit) | Latitude |
|---|---|---|---|---|
| 2.50 m | 0.91 m | 1.30 m | 2.25 m | 1.34 m |
| 2.80 m | 1.12 m | 1.60 m | 2.77 m | 1.65 m |
| 3.20 m | 1.40 m | 2.00 m | 3.46 m | 2.06 m |
Read the last column, it is the one that surprises. Under a 2.50 m ceiling the entire acceptable zone fits within 1.34 m: beyond that, the speaker drops below 30° of elevation and stops doing its job. At 3.20 m the same zone is 2.06 m wide. The lower the ceiling, the less room for error.
A concrete example beats a principle. Ceiling at 2.50 m, single seat: the front height speakers go about 1.30 m in front of the seat, the rear ones 1.30 m behind. Shifting the whole set fifty centimetres forward pushes the rear pair out of the window.
Ceiling height is not a detail
Dolby places the comfortable zone between roughly 2.44 m and 3.35 m. This is not a requirement but an observation: below it, the angular gap between the main layer and the height layer becomes too small for the ear to separate them; above it, distance dilutes level and the room starts to sound like a hall.
Under a very low ceiling, the consequence is not that Atmos fails to work, it is that latitude disappears. The table above becomes a constraint rather than a range, and seat placement becomes a lever at least as important as speaker placement.
The point no setting can fix
This is the same observation as for subwoofer placement, in another form.
Calibration adjusts levels and delays. It makes a speaker louder, quieter, earlier, later. What it cannot do is move a source. The angle at which you perceive a speaker is fixed by the geometry of the room and the position of your head, and no menu changes it.
A height speaker mounted at 20° of elevation will stay at 20°, however carefully it is calibrated afterwards. That is why placement is decided before the equipment is bought, not after it is installed.
Toward the seat, or straight down?
The question comes up as soon as ceiling speakers are mentioned, and the answer depends on their directivity.
| Speaker directivity | Aim | Why |
|---|---|---|
| Wide dispersion (45° or more) | straight down | it already covers the listening area; angling it gains nothing and unbalances the treble between seats |
| Narrow directivity | at the main position | otherwise its treble passes the listener by |
| Several rows | wide dispersion preferable | aiming at the first row starves the second; forgiveness beats precision here |
Where the answer is different
The ceiling slopes. The elevation angle is still measured from the ear, but the available surface is no longer horizontal: at equal horizontal distance, two spots on a slope do not have the same elevation. The arithmetic still holds; the geometry changes.
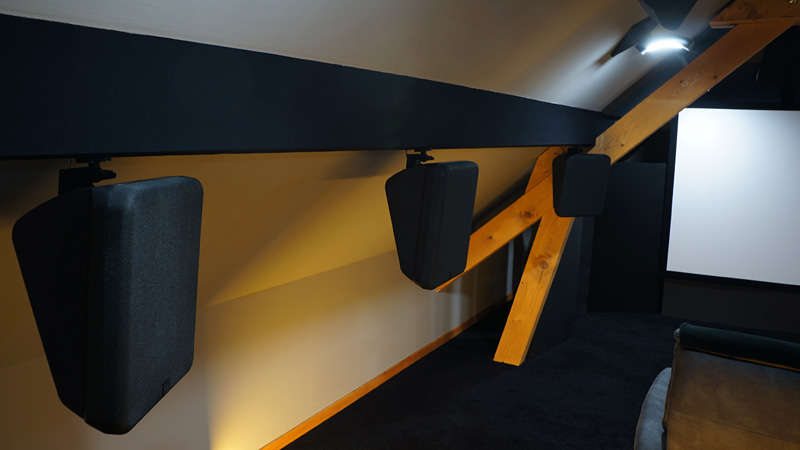
A loft space. Sloping sides and tie beams often give generous height at the ridge and very little at the edges. The acceptable zone becomes a narrow band, and this is exactly the case where you model before you drill.
Beams cross the ceiling. They rule out positions and obstruct high frequencies. Better to build them into the plan than to discover them while drilling.
You cannot flush-mount. Upward-firing height speakers, which bounce off the ceiling, exist precisely for this case. They assume a flat, reflective ceiling, and their result depends far more on the room than a flush-mounted speaker does.
There are several rows of seats. The angle is computed from one point, and there are several. As with the subwoofer, the right compromise is sought across all the seats rather than at the best one.
What HTM computes, and what you still need to verify
HTM starts from the actual geometry of your room, including an L shape, a sloping ceiling or a loft, and positions the speakers according to the chosen configuration while displaying the angles obtained rather than ready-made dimensions. You therefore see immediately whether a height speaker falls within the 30° to 55° range, and by how much you are outside it.
The point is to do this work before the building work: moving a point on a plan costs a click, moving a flush mount costs a ceiling.
These are predictions based on what you entered. They replace neither listening nor measurement, and the full approach is to predict, then verify: see the guide on measuring with REW.
Sources
- Dolby Atmos Home Theater Installation Guidelines (Dolby, PDF): elevation range, height ratio to the main layer, ceiling height range, aiming according to directivity.
- The distances on this page are computed by trigonometry from a seated ear height of 1.20 m. Adjust that value to your own seating: it shifts the whole window.
Further reading
The page on subwoofer placement deals with the same kind of geometric constraint in the bass, and the glossary defines the terms used here. The frequently asked questions cover how the application works.