
On a computer: connect your assistant to HTM
The HTM desktop application (Windows, macOS, Linux) acts as an MCP connector for your assistant: Claude Desktop, ChatGPT for desktop, or another assistant that accepts a local MCP connector. No instructions to paste and no file to copy.
- In HTM, open Settings → AI assistant and choose your assistant. HTM preselects the one it finds on the computer.
- Quit the assistant first, then click "Add to…": HTM writes its connector into the assistant's configuration and keeps a copy of the previous file. If the list does not offer to add it, copy the configuration shown into the assistant's MCP settings.
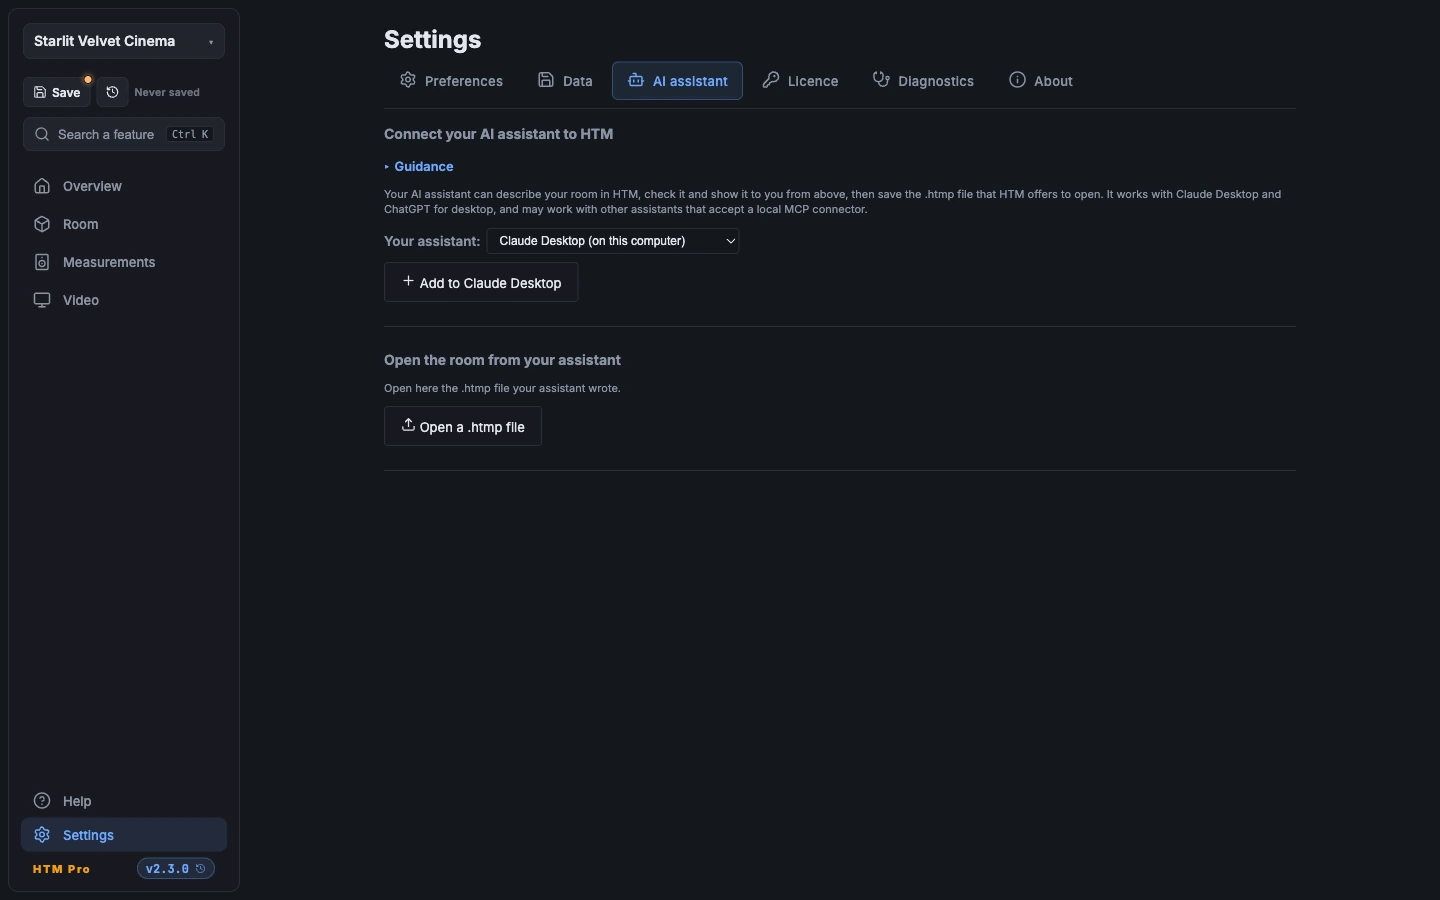
Settings → AI assistant: HTM found the assistant installed on the computer. - Open the assistant again and ask it to model your room with HTM. It reads the format and the examples, describes the room, has HTM check it (what HTM corrects, its warnings), looks at it from above with the wall numbers, and corrects itself.

Your request, the calls to HTM, then the assistant's answer with the top view HTM sends back. - It saves the room in the HTM folder of your Documents, and HTM, if it is open, offers to open it. When the assistant corrects it later, HTM offers to update the open room, or does it by itself if you tick "Always update without asking", as long as you have not changed the room in HTM. Saved elsewhere (ChatGPT writes to its own folder), open it from Settings → AI assistant → "Open a .htmp file".
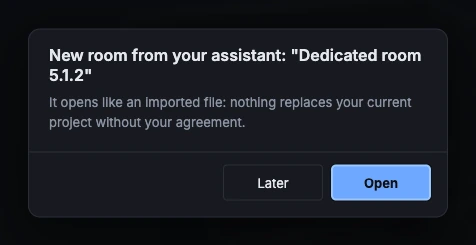
The assistant's room arrives, and HTM offers to open it.
With Pro, the assistant can also ask for HTM's acoustic prediction: reverberation per octave band, room modes, bass at every seat and treatment plan. Open HTM once after activating it so the connector sees it. The connector runs on your computer only and sends nothing anywhere.
The assistant can also work on a project you made in HTM: click Settings → AI assistant → "Share with my assistant", then ask it to open it. Its changes come back to HTM as an update of that project. When you ask, it also opens in HTM the room it has just saved, and starts HTM if it is closed.
Without the connector: the assistant writes a file
This is the alternative when the assistant cannot connect to HTM: in a web browser, on a phone, or an assistant that does not accept a local connector. It takes more handling, and the assistant does not see HTM's checks: you discover them when you open the file.
Show the method without the connectorHide the method without the connector steps, instructions to copy, examples, format
In three steps
- Open a new conversation with your assistant and paste the instructions below.
- Describe your room: dimensions, screen, seat rows, doors and windows, speaker configuration (for example 5.1.2). The assistant asks the missing questions, then writes the
my-room.htmpfile. - Save the file and open it in HTM: Settings → AI assistant → "Open a .htmp file", or "Open with HTM" from the file itself.
The instructions to copy
You will help me describe my home cinema for the Home Theater Maestro (HTM) software. Ask me the missing questions, one at a time. If I don't know, suggest a common value and say so. At the end, write a single JSON file named my-room.htmp, without comments, in the format of the examples on https://hometheatermaestro.fr/en/guides/describe-your-room-to-ai.html, and do not invent any other field. Describe the room and the speaker configuration, do not propose any speaker position: HTM places them itself.

Frame: facing the screen, X to the right from the LEFTMOST wall, Z towards the back from the screen wall, Y up from the floor. In a rectangle, the origin is the front left corner. All dimensions in metres.

- schemaVersion: "1.1". name: the room name.
- room.width, room.length, room.height: width (left wall to right wall), length (screen wall to rear wall), ceiling height. room.shape: "rectangular".
- Room that is not a rectangle (L-shaped, cut corner, trapezoid, hexagon): instead of room.width, room.length and room.shape, room.contourEnMurs, the list of walls { longueurM, angleDeg } in walking order. Start at the left end of the screen wall and go round to the right. angleDeg is the inner angle of the corner where the wall starts (90 for an ordinary corner, 270 in a recess, 135 for a 45° cut corner), omitted for the first wall. The last wall closes the room. Keep room.height. Everything placed in the room (furniture, panels, AV cabinet, posts) is still measured from the leftmost wall (X) and the screen wall (Z), even when the screen wall starts further right (a cut corner).
- room.screen: type ("projection" or "tv"), aspectRatio ("16:9", "2.35:1", "2.39:1", "2.40:1", "21:9" or "4:3"), baseWidthMeters (image width), centerHeightMeters (height of the image centre), acousticallyTransparent (true if the speakers are behind an acoustically transparent screen, then with frontWallOffset, the screen's distance from the wall). For a TV given by its diagonal in inches, baseWidthMeters = inches × 0.0254 × 0.872 (16:9). A room without a screen: leave room.screen out.
- room.seating: rows, the list of rows { id, seatCount, distanceFromScreen (measured from the screen WALL), seatSpacing, platformElevation (riser height, omitted on the floor) }, mlpRow and mlpSeat (reference row and seat, counted from 0), earHeight (seated ear height, above the row's floor, for armchairs: a sofa row uses 1.00 unless the row gives its own earHeightM).
- room.doors: the list of doors { id, mur (number of the wall in the walk, from 1), depuisLeDebutM (distance from the corner where that wall starts, in walking direction, to the edge of the door), widthM, heightM, swing ("inward", "outward" or "sliding") }. In a rectangular room, wall 1 is the screen wall, 2 the right wall, 3 the rear wall, 4 the left wall. Each wall is measured from the corner where it starts in walking order: wall 3 from its right end, wall 4 from its rear end.
- room.windows: the list of windows { id, mur, depuisLeDebutM, widthM, heightM, sillM (sill height) }.
- layout: the speaker configuration, following the examples. A configuration written 7.2.4 has 7 speakers around the room (floor.count), 2 subwoofers (sub.count) and 4 height speakers (height.count): the second number is the subwoofer count, and the three numbers follow the announced configuration. 5.1: floor.count 5. 7.1: floor.count 7 and surroundBack true (the rear pair Lrs and Rrs). rearSurrounds1 and rearSurrounds2 are further rear pairs, not the 7.1 pair. Heights: 0, 2 ("top-middle-2", topMiddle true) or 4 ("top-front-rear-4", topFront and topRear true). format: "dolby-atmos" if there are height speakers, otherwise "dolby-digital".
Three complete examples
Each one opens in HTM as is, with no correction and no warning. They serve as a model for your assistant, and you can also open them to see the result.
- Dedicated room, 5.1.2: 4.2 × 6.0 m, 2.6 m ceiling, two rows including one on a riser, 2.35:1 projection, door on the left wall.
- Living room with a television, 5.1: 5.0 × 7.0 m, a three-seat sofa, 16:9 television, a window and a door.
- 7.1.4 room with two rows: 5.0 × 7.0 m, acoustically transparent screen set off the wall, one front-centre subwoofer, reference seat in the second row.
See the 5.1.2 dedicated room file
{
  "schemaVersion": "1.1",
  "room": {
    "width": 4.2,
    "length": 6.0,
    "height": 2.6,
    "shape": "rectangular",
    "screen": {
      "type": "projection",
      "aspectRatio": "2.35:1",
      "baseWidthMeters": 2.8,
      "centerHeightMeters": 1.3,
      "acousticallyTransparent": false
    },
    "seating": {
      "rows": [
        {
          "id": "r1",
          "seatCount": 3,
          "distanceFromScreen": 3.6,
          "seatSpacing": 0.65
        },
        {
          "id": "r2",
          "seatCount": 3,
          "distanceFromScreen": 4.9,
          "seatSpacing": 0.65,
          "platformElevation": 0.3
        }
      ],
      "mlpRow": 0,
      "mlpSeat": 1,
      "earHeight": 1.1
    },
    "doors": [
      {
        "id": "porte",
        "wall": "leftWall",
        "position": 2.3,
        "widthM": 0.83,
        "heightM": 2.04,
        "swing": "inward"
      }
    ]
  },
  "layout": {
    "format": "dolby-atmos",
    "floor": {
      "count": 5,
      "options": {
        "center": true,
        "surrounds": true,
        "surroundBack": false,
        "wides": false,
        "extraSurroundsRear": false,
        "extraSurrounds": false,
        "rearSurrounds1": false,
        "rearSurrounds2": false,
        "centerSurroundPair": false,
        "frontCenter": false,
        "centerSurround": false
      }
    },
    "sub": {
      "count": 1
    },
    "height": {
      "count": 2,
      "arrangement": "top-middle-2",
      "options": {
        "frontHeight": false,
        "topFront": false,
        "topMiddle": true,
        "topRear": false,
        "rearHeight": false,
        "voiceOfGod": false
      }
    }
  }
}
See the 5.1 living room file
{
  "schemaVersion": "1.1",
  "room": {
    "width": 5.0,
    "length": 7.0,
    "height": 2.5,
    "shape": "rectangular",
    "screen": {
      "type": "tv",
      "aspectRatio": "16:9",
      "baseWidthMeters": 1.66,
      "centerHeightMeters": 1.25,
      "acousticallyTransparent": false
    },
    "seating": {
      "rows": [
        {
          "id": "canape",
          "seatCount": 3,
          "distanceFromScreen": 2.8,
          "seatSpacing": 0.7
        }
      ],
      "mlpRow": 0,
      "mlpSeat": 1,
      "earHeight": 1.05
    },
    "doors": [
      {
        "id": "porte",
        "wall": "rightWall",
        "position": 5.8,
        "widthM": 0.9,
        "heightM": 2.04,
        "swing": "inward"
      }
    ],
    "windows": [
      {
        "id": "fenetre",
        "wall": "leftWall",
        "position": 5.4,
        "widthM": 1.6,
        "heightM": 1.4,
        "sillM": 0.9
      }
    ]
  },
  "layout": {
    "format": "dolby-digital",
    "floor": {
      "count": 5,
      "options": {
        "center": true,
        "surrounds": true,
        "surroundBack": false,
        "wides": false,
        "extraSurroundsRear": false,
        "extraSurrounds": false,
        "rearSurrounds1": false,
        "rearSurrounds2": false,
        "centerSurroundPair": false,
        "frontCenter": false,
        "centerSurround": false
      }
    },
    "sub": {
      "count": 1
    },
    "height": {
      "count": 0,
      "arrangement": "top-middle-2",
      "options": {
        "frontHeight": false,
        "topFront": false,
        "topMiddle": false,
        "topRear": false,
        "rearHeight": false,
        "voiceOfGod": false
      }
    }
  }
}
See the 7.1.4 room file
{
  "schemaVersion": "1.1",
  "room": {
    "width": 5,
    "length": 7,
    "height": 2.8,
    "shape": "rectangular",
    "screen": {
      "type": "projection",
      "aspectRatio": "2.35:1",
      "baseWidthMeters": 3.4,
      "centerHeightMeters": 1.45,
      "acousticallyTransparent": true,
      "frontWallOffset": 0.35
    },
    "seating": {
      "rows": [
        {
          "id": "r1",
          "seatCount": 3,
          "distanceFromScreen": 3.2,
          "seatSpacing": 0.7
        },
        {
          "id": "r2",
          "seatCount": 3,
          "distanceFromScreen": 4.6,
          "seatSpacing": 0.7,
          "platformElevation": 0.35
        }
      ],
      "mlpRow": 1,
      "mlpSeat": 1,
      "earHeight": 1.1
    },
    "doors": [
      {
        "id": "porte",
        "wall": "rearWall",
        "position": 0.8,
        "widthM": 0.9,
        "heightM": 2.04,
        "swing": "inward"
      }
    ]
  },
  "layout": {
    "format": "dolby-atmos",
    "floor": {
      "count": 7,
      "options": {
        "center": true,
        "surrounds": true,
        "surroundBack": true,
        "wides": false,
        "extraSurroundsRear": false,
        "extraSurrounds": false,
        "rearSurrounds1": false,
        "rearSurrounds2": false,
        "centerSurroundPair": false,
        "frontCenter": false,
        "centerSurround": false
      }
    },
    "sub": {
      "count": 2,
      "strategy": "diagonal"
    },
    "height": {
      "count": 4,
      "arrangement": "top-front-rear-4",
      "options": {
        "frontHeight": false,
        "topFront": true,
        "topMiddle": false,
        "topRear": true,
        "rearHeight": false,
        "voiceOfGod": false
      }
    }
  }
}
A room that is not a rectangle
The instructions also describe L-shaped, cut-corner, trapezoid or hexagonal rooms: wall by wall, the way you measure them, with the length of each wall and the angle of the corner where it starts. Doors and windows are attached to a wall by its number, with the distance from the corner where that wall starts. If the measurements do not quite add up, HTM says on loading by how much the outline did not close. Six examples, all opening without correction:
- L-shaped room: six walls, one recess, a door.
- Cut-corner room: one rear corner cut at 45°, a door on the cut wall.
- Trapezoid room: side walls widening towards the back.
- Hexagonal room: six walls, no right angle.
- Room with two cut rear corners: both rear corners cut at 45°.
- Irregular office: eight walls, two recesses, a door and a window. A small real room: HTM reports what you need to know (volume, screen wall width).
Going further: attic, surfaces, treatment, speakers
For a more complete room, also paste these second instructions. They point to the full format, published with each HTM version: the file schema (generated from HTM, so it cannot lag behind the application) and the list of materials, with their French and English names.
For a more complete room, add the following. Follow the published schema https://hometheatermaestro.fr/guides/exemples-ia/htmp.schema.json and only use the identifiers from https://hometheatermaestro.fr/guides/exemples-ia/identifiants.json (French and English names of the materials, and under "aspect" the colours, models and finishes, with where each one goes). If you are unsure about a field, leave it out: HTM uses its default value.

- Attic (sloped ceiling): room.height equal to the highest point, and room.ceiling { kind ("attic"), attic { peakHeight (highest height), sideHeight (height where the slope meets the low walls), kneeWallHeight (height of the vertical knee walls, usually equal to sideHeight), ridgeAxis ("width" if the ridge runs from left to right, parallel to the screen wall, "length" if it runs from the screen to the back), flatTopWidth (depth of a flat part at peakHeight between the two slopes, 0 for a pointed ridge), ridgeOffset (offset of the ridge or of the flat part from the middle of the room, 0 if centred) } }. It works with a rectangle as with room.contourEnMurs. A single slope (one side high): monoPitch ("leftHigh", "rightHigh", "frontHigh" or "rearHigh", the HIGH side, at peakHeight), and monoFlatWidth for a flat part at peakHeight along the high wall before the slope starts (0: slope from wall to wall). ridgeAxis stays required but is ignored, as is flatTopWidth.
- Surfaces: room.surfaces, the six surfaces frontWall, rearWall, leftWall, rightWall, ceiling and floor, each { materialId, overlays }. overlays is the list of what covers part of the surface { materialId, coverage (covered share, from 0 to 1) }. Under an attic, ceilingRampants describes the slopes. Give all six: a missing one takes HTM's default material.
- Installed acoustic panels: room.acousticPanels, the list { id, x, z (centre on the floor), rotationDeg (90 on the left wall, 270 on the right wall, 0 on the screen wall, 180 on the rear wall), widthM, heightM, elevationM (height of the bottom of the panel), layers (for example [{ "kind": "porous", "thicknessM": 0.1, "flowResistivity": 20000 }], the resistivity of each porous material being given in the identifiers), mounting ("wall", "ceiling", "free" for a standing panel, or "floor" for a rug, with a rug model from the identifiers) }. A wall panel has its centre half its thickness from the wall. A rug is such a panel lying on the floor, not a floor covering.
- Speakers: layout.characteristics, per group front, wide, surround and height { type, directivityH, directivityV, formFactor, wallGapM }, with the schema values (for example formFactor "tower", "bookshelf", "on-wall" or "in-ceiling"). type, directivityH and directivityV are required in every block, per group as per channel. wallGapM is the gap from the back of the cabinet to the wall for speakers on stands, for example in front of a window or a glazed wall. Their look (drawn by HTM Pro) is a design { modelId, finish } per group, or per channel in layout.characteristicsByChannel, and the subwoofers' in layout.sub.cabinet.design: choose the model in lire_identifiants, famille "enceintes", by its name (horn, cinema, in-wall, tower…), among those whose formFactors contain the speaker's formFactor (a model with faces only for a bipole, dipole or tripole speaker). Cinema speakers with horns: type "horn-compression" and a horn or cinema model, for example "ecran-cinema-3-voies" (towers), "surround-pro-incline" (surrounds), "caisson-cinema-2x15-events" (subwoofers, with their sizes in layout.sub.cabinet). Without a model, HTM draws a horn model for a "horn-compression" speaker, and the report says which model each group gets. The groups: front (L, C, R, Lc, Rc), wide (Lw, Rw), surround (every ear-level surround: Ls, Rs, Ls1, Rs1, Ls2, Rs2, Lrs, Rrs, Lrs1, Rrs1, Lrs2, Rrs2, Lcs, Rcs, Cs) and height (every height and top speaker). A speaker with a model (design.modelId) and no sizes takes the sizes of the model, and a tower model its acoustic centre (HTM says so in the report).
- Subwoofers built into a wall or the ceiling: layout.subMountingByChannel gives each subwoofer channel (SW1, SW2…) its mounting, mode "flush" with the wall that houses it (frontWall, rearWall, leftWall or rightWall), or mode "ceiling". An infinite baffle (driver in a wall or the ceiling, its back open to the space behind) also takes "infinite-baffle" in layout.subPortByChannel for each of these channels: without it, HTM sees a built-in cabinet, not an infinite baffle.
- Pillars: room.piliers, the list { id, forme ("rond" or "rectangle"), largeurM, profondeurM (rectangle only), mur, depuisLeDebutM (from the corner to the edge of the pillar), distanceDuMurM (from the wall to the face of the pillar) }. Suspended structures (HTM Pro, drawing only): room.anneauxTruss, rings, frames or grids hung under the ceiling (definition AnneauTruss). HTM hangs no speaker on them: height speakers stay on the ceiling or the walls (heightMount). With an HTM Standard licence, do not write them.
- Look (drawn by HTM Pro): room.decor { murs (colour of all the walls), parMur (colour of one wall: frontWall, rearWall, leftWall or rightWall), plafond (ceiling colour), sol (floor colour, from the family of the floor material), aspectPlafond (ceiling look), plinthes and teintePlinthes (wooden skirting boards and their colour, not the LED skirting of room.ambiance) }, with the identifiers listed under "aspect" in the identifiers, never a colour code (only the LED colour, below, takes one). Seats and furniture take a design (modelId and finish) from the same list. A model does not change the sizes written in the file. An unknown identifier is ignored and HTM draws its default look.
- Furniture: room.objects, the list { id, kind ("sofa", "armchair", "desk", "bookshelf" or "plant", for example), x, z (centre on the floor), rotationDeg (the direction its front faces: 0 the screen, 90 the left wall, 180 the back, 270 the right wall), widthM, depthM, heightM, design }. The TV cabinet, the shelf under the screen or the rack that carries the electronics is room.avEquipment, never also an object: { form ("console" or "rack"), position (x and z the centre on the floor, y the height of its BASE, 0 on the floor), widthM, heightM, depthM, centerMount ("integrated" if the centre speaker is housed inside it, otherwise it stands on it and HTM raises the TV) }. Without it, HTM places one by default.
- Lighting (drawn by HTM Pro): room.ambiance { ton (LED colour, #rrggbb), gorge (an empty object {} for a cove light around the ceiling), plinthes (the same, for LED skirting), cielEtoile (true for a star ceiling), montants (vertical strips, parMur per wall), lignesPlafond (lines across the ceiling, each { id, distanceM from the screen wall }), spots (each { id, x, z }), appliques (wall lights, each { id, wall, position along the wall, hauteurM }) }.
- Risers: a row on a riser takes platformElevation in its row. A stage or a free platform: room.risers, the list { id, x, z (centre on the floor), widthM, depthM, heightM, profil (its shape, with steps in profil.gradins) }.
- Stepped ceiling (part of the ceiling higher or lower): room.ceilingSoffit { x0, x1, z0, z1 (the zone, x from the left wall, z from the screen wall), heightM (ABSOLUTE ceiling height in the zone), niveaux (nested levels, with the same fields, each inside the previous one) }.
- Front speakers set off the screen wall (on stands, or behind an acoustically transparent screen): layout.frontClearance, the distance in metres from the screen wall to the centre of their cabinets. Behind an acoustically transparent screen, give the speakers' distance, not the screen's: HTM keeps the screen a few centimetres in front of them. Ignored with a baffle wall (room.frontFacade).
- Projector (with a projection screen): room.projector { position (of the LENS, x, y, z), mount ("ceiling", "rear-wall", "technical-room" or "niche", the last one with niche) }. Add its optics (throwRatioMin, throwRatioMax, shiftVMinPct, shiftVMaxPct, shiftHMinPct, shiftHMaxPct) only from the projector data sheet, never estimated: without them HTM uses default optics and says so.
- Technical room behind a wall: room.technicalRoom { wall, widthM, depthM, heightM, lateralOffsetM }, with what stands in it given in room coordinates beyond that wall, and room.avEquipment.inTechnicalRoom true for a rack in it.
- Only describe what exists or what I tell you I want to build. No speaker position: HTM places them.
Five complete examples, opening without correction or warning:
- Treated attic room: ridge along the room, lined walls, partly absorbent slopes and rear wall, two wall panels.
- Room with finishes and panels: fabric-covered screen wall, diffuser at the back, rug on a wooden floor, first-reflection panels and a ceiling cloud.
- 7.1.4 room, typed speakers: front towers, dipole surrounds, in-ceiling coaxials, acoustically transparent screen.
- Living room with TV, TV cabinet and rug: 75-inch TV on its cabinet (the AV cabinet, not an object), sofa, sliding door and window, rug, bookcase, cove light.
- Dedicated room, baffle wall and projector in a niche: acoustically transparent screen in front of a baffle wall, second row on a riser, projector in a niche with the optics from its data sheet, rack at the back.
The safest model is your own room: if you already have one in HTM, download it (Settings → Data → "Download") and give the file to your assistant as an example. A friend's or an installer's file works too.
Depending on your assistant
- ChatGPT, Claude (in a web browser or on a phone): the assistant can give you the file to download. Ask for it if it does not offer.
- Gemini, Le Chat, Copilot and others: the assistant shows the content in a code block. Copy it into a text file named
my-room.htmp(Notepad, or TextEdit in plain text), saved as UTF-8. - Claude Desktop, ChatGPT for desktop or another local MCP client: connect the assistant to HTM instead (at the top of the page). There is no file to copy any more.
Either way: the limits
This is a first model, to check and complete in HTM: exact room shape, furniture, materials, treatment. If HTM has to correct a value on opening (a television too low to clear the centre speaker on the cabinet, for example), the loading message says so and names what to check.
- What the assistant does not describe takes HTM's default value: check and complete it from Room. Without the connector, the basic instructions stick to the room, the seats and the speakers, and the rest comes with the advanced instructions.
- What the assistant does not know, it guesses unless told otherwise: check the dimensions in HTM before relying on the layout. Connected to HTM, it sees during the conversation what HTM corrects and can fix it. Without the connector, you only find out when you open the file.
- Your exchanges with the assistant fall under its own terms of use. We receive nothing: HTM only reads the room the assistant describes to it on your computer, or the file you open.